


Splitting the screen on a laptop allows users to view and work with multiple applications side-by-side, improving multitasking and productivity. The easiest way to split the screen is by dragging a window to the left or right edge of the display until it snaps into place, then selecting another app to fill the remaining space. This feature works on both Windows 10 and 11, making it accessible for most laptop users.
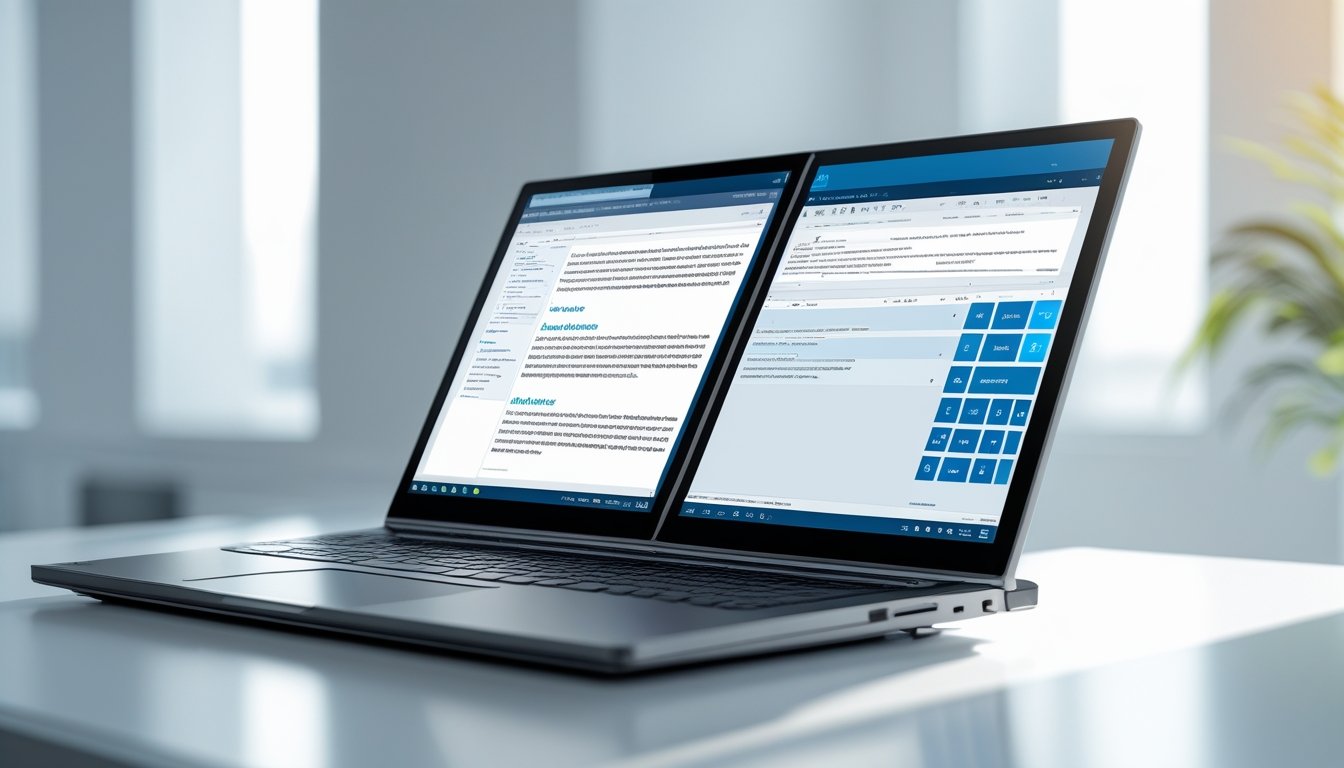
Many also use keyboard shortcuts, such as pressing the Windows key plus the left or right arrow, to quickly organize their open windows without a mouse. With advanced features like Snap Layouts on Windows 11, screens can be divided into two, three, or even four sections, tailoring the workspace to diverse needs.
Understanding how to efficiently split a screen helps users manage tasks like comparing documents, referencing tutorials, and monitoring multiple programs simultaneously. This guide covers practical steps to set up split screens on a laptop, helping users work smarter and stay organized throughout their day. For more detailed instructions, visit this step-by-step guide on how to split screen on a laptop.
How to use Split Screen on your Laptop?
Split screen mode allows users to work with multiple windows visible at once, improving multitasking efficiency. It involves tools like Snap Layouts, mouse dragging, or keyboard shortcuts to organize windows quickly. Managing remaining space after placing initial windows is essential for balanced layouts.
What is split screen mode?
Split screen mode is a built-in feature of Windows that lets users display and interact with two or more app windows side by side. It removes the need to minimize or switch between tabs constantly, which is useful for comparisons, multitasking, or referencing information.
This mode works on single or multiple monitors. It can split the screen evenly or divide it into sections of different sizes based on user needs. It enhances productivity by keeping multiple programs accessible simultaneously.
Enable Snap Layouts
Snap Layouts is a feature introduced in Windows 11 that simplifies arranging open windows on the screen. When you hover over the maximize button of any window, multiple layout options appear for quick snapping.
Users activate Snap Layouts by enabling it in the system settings under Multitasking. This includes toggles for snapping windows automatically when dragged and suggestions to fill empty spaces. It allows snapping in 2, 3, or 4 window divisions.
Snap Layouts provide a visual grid, which streamlines positioning windows without trial and error, making workspace organization faster and less cumbersome.
Use Snap Layouts via mouse:
Using Snap Layouts with the mouse involves hovering the cursor over the maximize icon of an active window. Upon hovering, a layout grid appears showing options to snap the window to specific sections of the screen.
The user clicks on the desired section for the window to snap into place instantly. After placing the first window, Snap Layouts may suggest filling remaining screen areas with other open apps.
This feature reduces manual resizing and dragging. It is especially helpful on larger screens or when working with multiple applications simultaneously, offering precise placement with minimal effort.
Using drag and drop:
The classic method to split screen uses dragging and dropping windows manually. The user clicks the title bar of a window and drags it toward the left or right edge of the screen.
Once the window reaches the edge and a transparent outline appears, releasing the mouse snaps the window to that half. The other open windows then show as thumbnails, allowing the user to select one to fill the opposite side.
Dragging a window to a corner can snap it into a quarter section for more complex layouts. This method works on both Windows 10 and 11 without needing special settings enabled.
Using keyboard shortcuts:
Keyboard shortcuts provide fast window snapping without using the mouse. Holding the Windows key and pressing the left or right arrow snaps the active window to that half of the screen.
Pressing Windows + Up or Down further adjusts the window size by snapping it to a corner or restoring/maximizing it. Combinations like Windows + Left then Up put the window in the top-left quarter.
This method allows quick multitasking without switching to the mouse, improving workflow speed. It is crucial to learn these shortcuts for efficient split screen use across devices.
Filling remaining spaces:
After snapping one or more windows, Windows often suggests apps to fill remaining empty sections. These appear as clickable thumbnails on the open screen edges.
Users can also manually select any open window to fill remaining spaces for balanced layout. If more than two windows are snapped, adjusting each window’s size may optimize visibility.
In Windows 11, Snap Groups allow users to save and recall window arrangements with their layouts intact. This helps maintain workflow continuity for multi-window tasks across sessions.
Adjustments can be made by dragging window borders, ensuring all necessary applications are visible and usable.
How to use split screen on Windows 11 laptops?
Splitting the screen on a Windows 11 laptop allows users to view and manage multiple applications simultaneously. It helps improve multitasking by organizing windows efficiently without manually resizing each one.
1. What is Split Screen mode in Windows?
Split Screen mode, also called Snap Assist or Snap Layouts in Windows 11, divides the display into sections so multiple apps can be visible at once. The screen can be split into two, three, or even four parts.
This feature helps users work on different tasks side-by-side without switching windows constantly. It adjusts windows automatically based on the chosen layout. Snap Assist also recommends apps to fill available screen space after snapping one window.
2. How do I enable and use Split Screen mode on Windows 11?
To enable Split Screen mode, the user must first ensure Snap windows are on:
- Go to Settings > System > Multitasking
- Toggle Snap windows to On
To use it, drag a window to the left or right edge of the screen until an outline appears, then release to snap the window. Windows 11 will show available spaces for other open apps. Click any app to snap it to the remaining space.
Keyboard shortcuts:
- Win + Left/Right arrow to snap a window half-screen
- Win + Up/Down arrow to move snapped windows into quadrants or maximize/minimize
Windows 11 also offers Snap Layouts by hovering over the maximize button, letting users pick from predefined screen arrangements. This advanced snapping enables more precise multitasking setups on laptops with varying screen sizes.
For detailed Snap Layout options and multitasking tips, see How to split screen on laptop and monitor Windows 11.
Split screen mode real-world use cases

Split screen mode enhances productivity by allowing users to work on multiple applications simultaneously. It is especially helpful in environments that require frequent multitasking and information comparison without constant window switching.
Now that you know what split screen mode is, here are a few real-world use cases for split screen mode on Windows.
Users who need to monitor email while writing documents can keep both apps visible, reducing the time spent switching between windows. This setup improves focus and speeds up communication without interrupting other work.
Developers benefit from split screen by viewing code on one side and the application output or documentation on the other. This arrangement streamlines debugging and reference, facilitating smoother workflow.
Students and researchers use split screen to read source material on one side while taking notes or drafting papers on the other. This method helps maintain concentration and minimizes distractions.
For video editors or designers, split screen allows workspace management, such as keeping editing tools open beside preview windows. This organization supports precise adjustments without overlapping elements.
Gamers and streamers often split their screen to manage chat, controls, or system monitoring alongside gameplay, maintaining control of multiple inputs and interactions efficiently.
More details on using split screen effectively can be found in the guide on how to split screen on Windows laptops and monitors.
Split screen mode for gaming
Split screen mode enables multiple players to share a single display, allowing simultaneous gameplay without needing extra monitors. It can also help multitask by showing game controls or chat alongside the main game. However, there are key considerations for performance and usability in gaming laptops.
Is Split Screen mode suitable for gaming, and how do ASUS laptops address its limitations?
Split screen gaming demands high processing power and a large enough display to prevent cramped visuals. Many games support native split screen, designed to optimize performance and screen allocation for multiple players. However, on laptops, particularly those with smaller screens, split screen can reduce visibility and introduce input lag.
ASUS laptops tackle these challenges by integrating powerful GPUs and high-refresh-rate displays. Features like custom Snap Layouts in Windows 11 allow flexible window arrangements, which help balance game visibility with other apps. Additionally, ASUS includes software tools to adjust performance settings, ensuring smoother gameplay during split screen sessions.
For detailed guidance on enabling split screen on Windows laptops, including ASUS models, visit how to split screen on Windows 10 & 11 laptops.
How ASUS makes split screen better
ASUS improves the split screen experience by blending hardware innovation with software features. Their approach enhances productivity beyond standard window snapping by integrating additional screens and customization options that adapt to user workflow.
4. How do ASUS dual-screen laptops enhance multitasking compared to regular split screen?
ASUS dual-screen laptops, like the ZenBook Duo series, add a secondary touchscreen that expands workspace without shrinking each app’s view. This second display enables seamless drag-and-drop between screens and specialized app layouts, reducing the need to constantly switch windows.
Unlike conventional split screen, which divides one screen, ASUS’s dual displays allow users to dedicate entire screens to different tasks, increasing focus and efficiency. The secondary screen also supports pen input and app-specific tools for creative and professional workflows, making multitasking more fluid and versatile compared to relying solely on software-based split screen features. This hardware-software integration sets ASUS dual-screen models apart in multitasking capabilities.
More details about ASUS dual-screen multitasking can be found in this guide to ASUS ZenBook split screen.
How to use multiple monitors in Windows
Windows allows users to connect and customize multiple monitor setups to expand their workspace effectively. It provides tools to identify, detect, connect, arrange, and adjust each display’s settings for optimal use.
Identify a display
When multiple monitors are connected, Windows assigns numbers to each screen for easy identification. Users can open Display settings and click the Identify button to display a large number on each monitor. This number corresponds to its position in Windows.
Identifying displays helps users understand which physical monitor matches each virtual screen. This is especially useful when arranging displays or troubleshooting display issues.
Detect a display
If Windows does not recognize a newly connected monitor, users can manually prompt detection. In Display settings, clicking Detect forces Windows to search for additional displays. This is crucial for external monitors connected via HDMI, DisplayPort, or USB-C.
Detection ensures that all monitors are properly recognized and ready for configuration. If detection fails, verifying cable connections and compatibility may resolve the issue.
Connect a wireless display
Windows supports wireless displays through Miracast technology. To connect, users open the Project sidebar (Win + P) and select Connect to a wireless display. The system will scan for nearby compatible devices like smart TVs or wireless display adapters.
Once connected, users can extend or duplicate their desktop wirelessly. This eliminates the need for physical cables and allows flexible, clutter-free multi-monitor setups.
Arrange your displays
The physical layout of monitors often differs from Windows’ default settings. Users can drag and reposition monitor icons in Display settings to match their actual arrangement on the desk. This alignment allows the mouse cursor and windows to move naturally between screens.
Proper arrangement avoids confusion and improves workflow by mirroring real-world monitor placement. It also helps when using split-screen features across different monitors.
Change orientation
Monitors can be set to landscape or portrait mode depending on user needs. In Display settings, selecting a specific display and choosing the Orientation dropdown allows this adjustment. Portrait mode is common for reading or coding on a single vertical monitor.
Changing orientation optimizes content viewing based on the task. It also supports ergonomic setups by aligning displays with user preferences.
Rearrange your displays
Properly arranging displays ensures smooth cursor movement and efficient window management across multiple screens. Aligning the physical layout with the digital setting reduces disorientation and improves workflow.
Arrange your displays
To arrange displays on Windows, open Display settings by right-clicking the desktop and selecting “Display settings” or pressing Windows + I then navigating to System > Display. A diagram shows connected monitors labeled with numbers.
Drag these monitor icons to match their physical placement. For example, if the external monitor is to the right of the laptop screen, place its icon to the right of the laptop’s on the screen.
Confirm the arrangement by moving the cursor between screens. This setup allows windows to snap correctly when dragged across displays. Users can also change resolution and orientation here if needed for better alignment.
This method works in Windows 10 and 11 for multi-monitor setups, providing a smooth and accurate dual-screen experience. Details can be found in the guide on how to rearrange multiple monitors on Windows 10.
Multiple display options
Using multiple displays involves selecting how screens work together and adjusting settings to fit the user’s needs. Options include extending the desktop across screens or duplicating the same content on each.
Choose a display option
Users can choose from several display modes in Windows settings:
- Extend: Treats multiple screens as one large desktop, allowing windows to move between monitors.
- Duplicate: Shows the same content on all connected monitors; useful for presentations.
- Second screen only: Turns off the laptop display to use only the external monitor.
- PC screen only: Displays content only on the laptop.
To select a mode, users open Settings > System > Display and find the Multiple displays section. Selecting the drop-down menu offers these options, enabling users to pick the best setup for their workflow or presentation needs.
Change display options
Adjusting display options allows users to set screen resolution, orientation, and arrangement to match physical monitor layout.
Windows detects connected monitors automatically but users can rearrange them by dragging display icons in Display Settings. This ensures mouse movement flows naturally between screens.
Resolution settings can be changed individually for each monitor to maintain clarity. Orientation options like landscape or portrait may be set based on monitor positioning.
Users can also toggle options such as “Make this my main display” to prioritize where new windows and taskbars appear. These adjustments are found under the Multiple displays section in Settings. Further customization improves usability depending on the workspace.
For detailed guidance, see the multiple monitors setup in Windows.
Connecting a monitor
Setting up an external monitor requires proper connection methods tailored to the user’s equipment. Whether using cables or wireless technology, compatibility and configuration are crucial for smooth operation.
Connect a wireless display
To connect a wireless display, the laptop and monitor must support technologies like Miracast or Wi-Fi Direct. The user should ensure both devices are on the same Wi-Fi network and that the monitor or TV is powered on and in wireless display mode.
On a Windows laptop, the user can open the Action Center and select “Project” or press Windows + P. Then, choosing “Connect to a wireless display” will prompt scanning for available screens. Selecting the desired monitor will initiate the connection.
Wireless connections can introduce slight latency and depend heavily on network quality, so users seeking minimal delay should consider a wired connection instead.
Conclusion
Using the split screen feature on a laptop enhances multitasking by allowing users to view multiple windows side-by-side. This capability helps manage different tasks without constantly switching between applications.
Windows 10 and 11 include built-in tools, such as keyboard shortcuts and snap layouts, that make splitting the screen quick and efficient. Adjusting the window sizes is simple by dragging the divider, offering flexible workspace customization.
For setups involving external monitors, extending or duplicating displays via HDMI connections further improves productivity. Users can easily manage separate apps across screens to maximize their available workspace.
Mastering split screen usage can benefit anyone, from students managing assignments to professionals handling various projects simultaneously. Consistent use leads to better organization and time management.
Key points to remember:
- Use Windows + Arrow keys for fast snapping.
- Drag windows to screen edges to activate split view.
- Customize Snap Assist settings for smoother operation.
These tools are practical and straightforward, helping users increase efficiency without additional software. Learning how to split the screen effectively supports focused and organized computer use.
More detailed instructions are available in guides on how to split screen on Windows 10 and 11.
FAQs
Split Screen mode in Windows allows users to view and work with multiple applications simultaneously by dividing the screen into sections. It enhances multitasking with keyboard shortcuts, drag-and-drop features, and on some laptops, hardware innovations. Its effectiveness varies by use case, device, and system version.
1. What is Split Screen mode in Windows?
Split Screen mode is a built-in Windows feature that lets users snap app windows to different parts of the screen. This creates side-by-side or multi-section views without overlapping windows. It is designed to improve focus and efficiency by allowing simultaneous access to multiple programs.
Users can drag windows to screen edges or use keyboard shortcuts, like Windows key + arrow keys, to snap windows to the left, right, or corners. Windows 10 supports splitting into two sections. Windows 11 expands this with Snap Layouts, enabling 3 or 4 window splits with preset layouts.
2. How do I enable and use Split Screen mode on Windows 11?
To enable Split Screen in Windows 11, ensure “Snap windows” is turned on under Settings > System > Multitasking. Once enabled, hovering over the maximize button shows Snap Layout options.
Users can choose from layouts like half-screen splits or grids for 3-4 app windows. Alternatively, dragging windows to screen edges or using the Windows key + arrow keys snaps windows efficiently. This method maximizes use of screen real estate for multitasking, especially on larger or high-resolution displays.
3. What are some real-world use cases for Split Screen mode?
Split Screen helps in various workflows:
- Comparing documents or spreadsheets side-by-side without toggling windows.
- Research and writing by having a source on one half and a document editor on the other.
- Watching videos while working on emails or browsing.
- Video conferencing while taking notes or accessing files simultaneously.
- Coding with documentation on one screen half and code editor on the other.
It supports productivity in professional, educational, and entertainment contexts.
4. How do ASUS dual-screen laptops enhance multitasking compared to regular split screen?
ASUS dual-screen laptops feature a secondary physical display, separate from the main screen. This allows users to run multiple full-window apps without shrinking window sizes, unlike standard split screen which limits each app to portions of the same screen.
The second screen supports drag-and-drop between screens and independent app use, enhancing workflow flexibility. For example, streaming a video on one screen while editing a document on the other. This setup minimizes the compromises of traditional split screen and increases visible workspace.
5. Is Split Screen mode suitable for gaming, and how do ASUS laptops address its limitations?
Split Screen mode is generally limited for gaming because many games require full-screen focus and don’t support window snapping well. Dividing the screen can reduce resolution and frame rates, impacting performance and experience.
ASUS laptops with dual screens allow gamers to run a game on the main display at full performance while using the secondary screen for chat, guides, or media controls. This avoids performance drops associated with traditional split screen and improves multitasking during gameplay.


